 |
| 65-68 Mustang Custom Billet Aluminum Accelerator Linkage Rod www.VirginiaClassicMustang.com |
These are now in stock, and our part number is EG-1592.

|
| 65-68 Mustang Custom Billet Aluminum Accelerator Linkage Rod www.VirginiaClassicMustang.com |
 |
| www.VirginiaClassicMustang.com |
 |
| The crush tubes that fit inside the 1965-70 Mustang Rear Frame Rails are now available. www.VirginiaClassicMustang.com |
We now have the crush tubes that weld inside of the Mustang rear frame rails. These were originally installed in the rear frame rails of 65-70 Mustangs equipped with the factory dual exhaust. They provided extra strength at the holes where the rear exhaust hangers are mounted.
Our part number is SM-1031. They are sold as a pair.
 |
| Original Mustang Rear Frame Rail with holes for factory dual exhaust hangers. The crush tubes are located inside the frame rail. www.VirginiaClassicMustang.com |

 |
| The 1966 Shelby on the rotisserie and in epoxy primer. www.VirginiaClassicMustang.com |
 |
| The 1966 Shelby on the rotisserie and in epoxy primer. Here is an earlier shot showing the front frame rail support being straightened. We definitely wanted to save the original. www.VirginiaClassicMustang.com |
 |
| Here is the one of the original rails after being straightened. These rails are almost always dented from someone using this point to jack up the Mustang. www.VirginiaClassicMustang.com |
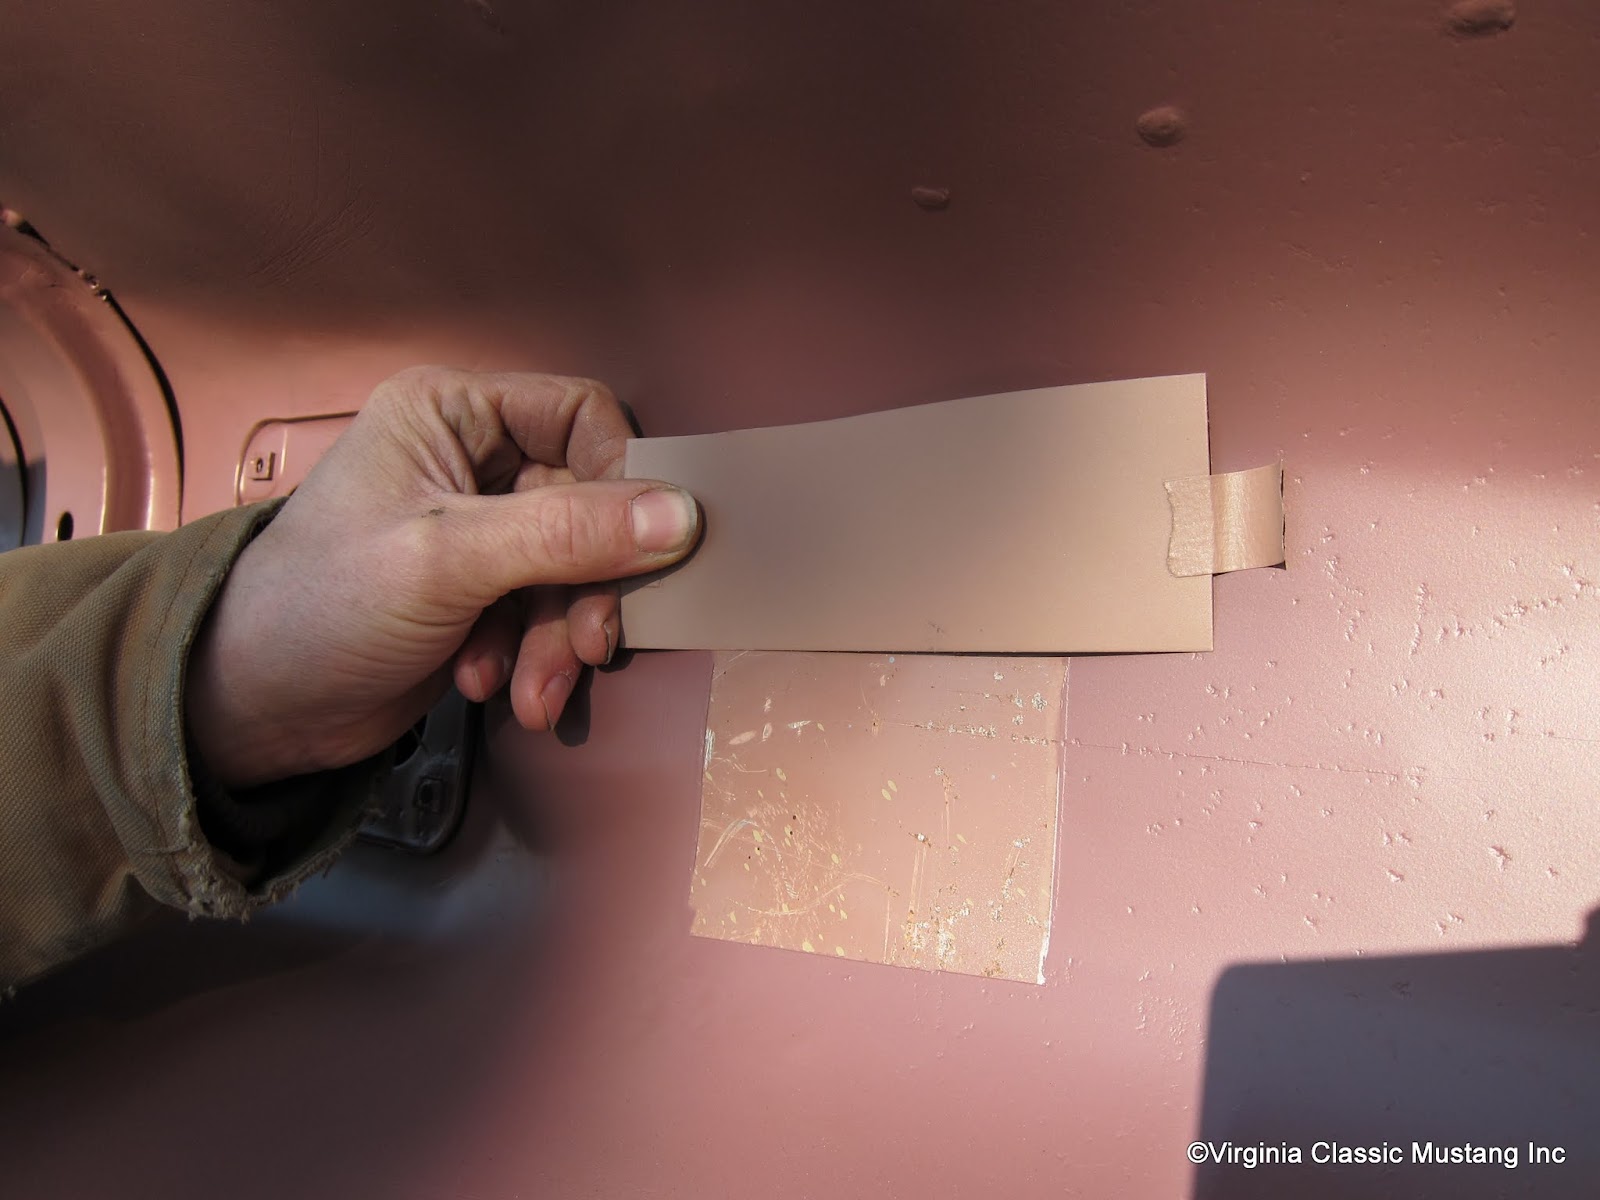 |
| This area in the transmission tunnel was taped off. It is a patch of the original paint. Here we are showing the paint that was chosen to match the original color. It is a strange pinkish brown color. I've seen this shade on late '65's and early '66's. The underside color is usually a bit darker on later '66 Shelbys. www.VirginiaClassicMustang.com |
 |
| This is a close up shot of the date stamp on the seat riser pan. It's June 17th. www.VirginiaClassicMustang.com |
 |
| Export brace reinforcement for the Shelby that was welded on the cowl area. www.VirginiaClassicMustang.com |
 |
| This photo shows a hole that was blown through the cowl when the export brace reinforcement was welded on at Ford. This area will be eventually covered in sealer like it was originally. www.VirginiaClassicMustang.com |
 |
| Here is a close up of the rear frame rail with the exhaust hanger holes found on the factory dual exhaust equipped Mustangs. www.VirginiaClassicMustang.com |
 |
| Here you can see the original holes for the tach wiring and bracket mounting that were cut in the dash at Shelby American. www.VirginiaClassicMustang.com |
 |
| We were lucky enough to have a very nice area of original paint. We saved this and will use it to match the original Wimbledon White paint. www.VirginiaClassicMustang.com |
 |
| Our 1966 GT350 Mustang Shelby Restoration project is now in epoxy primer. www.VirginiaClassicMustang.com |
 |
| Our 1966 GT350 Mustang Shelby Restoration project is now in epoxy primer. We chose to mix the colors to achieve a pinkish color for the underside. This will not be the final finish. www.VirginiaClassicMustang.com |
 |
| Our 1966 GT350 Mustang Shelby Restoration project is now in epoxy primer. www.VirginiaClassicMustang.com |
 |
| Our 1966 GT350 Mustang Shelby Restoration project is now in epoxy primer. www.VirginiaClassicMustang.com |
 |
| Our 1966 GT350 Mustang Shelby Restoration project is now in epoxy primer. This image shows the rear section of the floor pans and the rear parking brake cable brackets. www.VirginiaClassicMustang.com |
 |
| Our 1966 GT350 Mustang Shelby Restoration project is now in epoxy primer. This shot shows the backside of the dash. www.VirginiaClassicMustang.com |
 |
| Our 1966 GT350 Mustang Shelby Restoration project is now in epoxy primer. The original inner floor frame support was straightened and retained. More on this in our next post. www.VirginiaClassicMustang.com |
 |
| Our 1966 GT350 Mustang Shelby Restoration project is now in epoxy primer. This shot shows the underside of the panel behind the rear window from the trunk area. www.VirginiaClassicMustang.com |
 |
| The '66 Shelby Mustang is now in epoxy primer. The front engine compartment is shown here in black epoxy primer. www.VirginiaClassicMustang.com |
 |
| The '66 Shelby Mustang is now in epoxy primer. This image shows a close up of the bottom of the front frame rail. Primer was sprayed inside the clean rail. www.VirginiaClassicMustang.com |
 |
| The '66 Shelby Mustang is now in epoxy primer. This image shows a close up of the bottom of the front shock tower area. Primer was sprayed inside this area. www.VirginiaClassicMustang.com |
 |
| The '66 Shelby Mustang is now in epoxy primer. This image shows a close up of the rocker panel Primer was sprayed inside the clean rocker. www.VirginiaClassicMustang.com |
 |
| The '66 Shelby Mustang is now in epoxy primer. Primer was carefully sprayed in all of the seams. www.VirginiaClassicMustang.com |
 |
| The '66 Shelby Mustang is now in epoxy primer. Primer was carefully sprayed in all of the seams. www.VirginiaClassicMustang.com |
 |
| The '66 Shelby Mustang is now in epoxy primer. Primer was carefully sprayed in all of the seams. This is the area where the front of the rear leaf spring mounts. www.VirginiaClassicMustang.com |
 |
| The '66 Shelby Mustang is now in epoxy primer. Primer was carefully sprayed in all of the seams. This image shows the primer running out of the seat riser and floor pan areas. www.VirginiaClassicMustang.com |
 |
| The '66 Shelby Mustang is now in epoxy primer. This is the inside of the cowl area. www.VirginiaClassicMustang.com |
 |
| The '66 Shelby Mustang is now in epoxy primer. This image shows the inside of the lower radiator support crossmember which was sprayed with primer. www.VirginiaClassicMustang.com |

